

Project Code:
|
|
|
|
|


Okay, this one is a bit different. I decided to try out The X-Gamer X-ARCADE stick. I like the idea of having the panel and interface all done for you, then just bolting it into a cabinet and plugging it in. Thats the theory anyways. Lets see how it goes! (For an in-depth look at the stick, check out KCs review here)
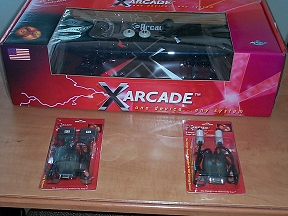
Whew! The controller got up here to Canada from California in about 2 days! I cant say enough nice things about these guys. Very professional, and FAST! I grabbed the optional adapters as well, since I might just make this cabinet compatible with my console games. You can just plug a Dreamcast, Playstation, or Playstation 2 into the controller and go! I think they also have adapters for the Gamecube and Xbox, but I dont have those consoles (yet!), so no need for those adapters.

Okay, look, this is one nice looking stick. What suprised me is that this monster is only about the width of a regular arcade cabinet, so it really wont be hanging over the sides too much, if at all. Excellent!

This has got to be a first: The instructions actually tell you to open the unit up to adjust the sensitivity of the joysticks...guess they dont have anything to hide! Nice neat work, and quality controls (jeez Im starting to sound like a commercial!), however if I was viewing this web page and thinking about buying one of these sticks, Id want to see a pic of the inside. Maybe this alone is enough to convince some people to get this ready-made controller instead of trying their luck building their own.

Okay, You want to go straight to your Mame machine? Just connect the PC adapter and then plug your ps2 keyboard into the back of the controller. Done.
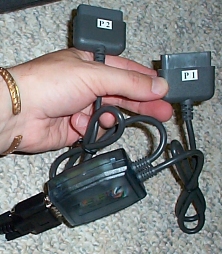
The PS/PS2 adapter goes into the player 1 and 2 port of your console. Done.

Sega Dreamcast? No problem, plug in this adapter, and youre good to go.
Now youre seen the stick, lets get down to the nitty-gritty. I am putting a P2 - 500 with 128 meg of RAM into this machine, along with a Soundblaster soundcard (wired directly to a volume pot on the top of the cab, and from there to the arcade speaker).
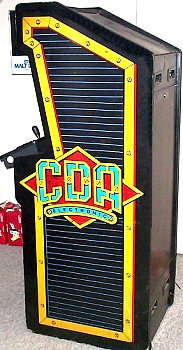
Heres the cab I got for this. Its a tad shorter than some games, but for this, it worked out PERFECT.
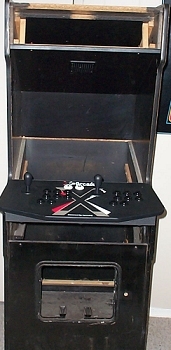
The control panel slid into this opening. I secured it to the cabinet with 3 bolts through the sides.
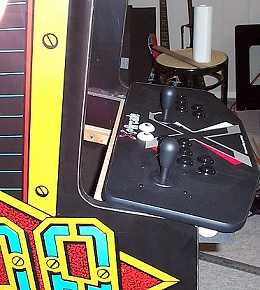
I made up a new front piece that comes up to the bottom of the X-arcade and removed the little rubber feet. reinforced the top of the panel by using hot glue on the inside joints.
IAnother shot of the panel in place. Note the flipper buttons for pinmame.

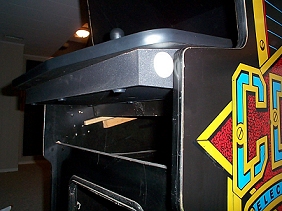
The back of the controller is still accessible. I removed the mode select button, but left it active inside. I also removed the plug and re-mounted it facing downwards into the cab so that no exploring fingers can get at it.
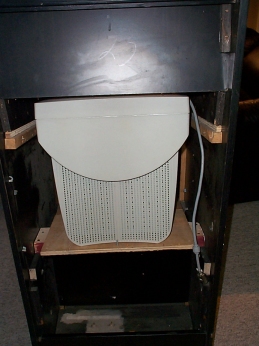
Here is the monitor I installed on a shelf. It brings the screen to the right height under the glass. The printer I use has taken some time off to recoup his sanity or some such thing, so I have to wait a bit on the artwork.
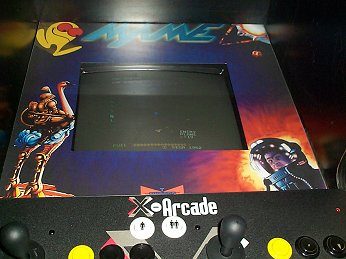
Here is the monitor poking up through the plexi. Easy as 1-2-3! This bezel is available for download in the marquee graphics section. Oh, and I replaced the fire buttons with yellow ones, to make it a little less confusing for the first-time player!.
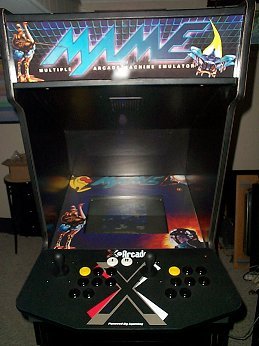
Finished!
So there you have it, you CAN get fairly professional results using this controller. Id like a trackball, but 90% of the games play perfectly (and after all, you can still use the joysticks for trackball games!)
|
(c)2003 MMP. All rights Reserved. No duplication without permission. |